

Art therapy
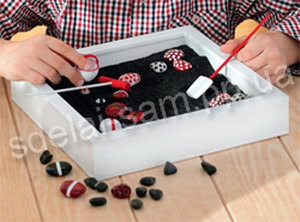
We all, both adults and children, need relaxation, and for these purposes you can make a miniature rock garden with your own hands. In Japan, such gardens in boxes are called suiseki – rocks on a tray. This is a reduced copy of the philosophical rock garden with its own rules and laws. A homemade rock garden can fit in a bowl or in a box. It can be landscapes based on sand and stones, water and plants, or mixed options.
All suiseki are made from natural materials in natural, soothing colors: brown, sand, gray. The main element is a stone, symbolizing eternity, strength and power. There should be an odd number of stones and they will be located diagonally. It is necessary to select stones of such a size that they do not clutter up the box. A composition consisting of one large stone and two smaller ones, which together form a triangle, is popular.
To create a rock garden in miniature, you need: a deep photo frame, plywood 2 and 4 mm thick, decorative black sand, pebbles, a wooden basket, wood glue and superglue, black, white and red acrylic paints, acrylic varnish, cooking skewers. Of the tools you will need: a screwdriver or drill, pliers, a jigsaw, a hammer, clamps, sandpaper.
Work order
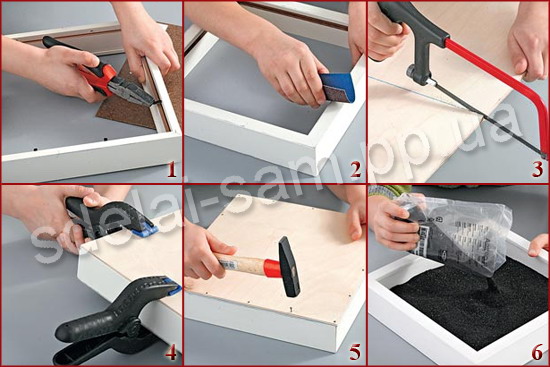
1. We disassemble the photo frame – remove the back wall and take out the glass. Using pliers, remove all metal fasteners.
2. We process the surface of the frame with sandpaper of medium grit, and then put the frame on a sheet of plywood 4 mm thick and trace its outline.
3. With a jigsaw, we cut out a marked square part measuring 25.5×25.5 cm from plywood. We process its sections with sandpaper. During work, you must use garden gloves to protect your hands.
4. Glue the plywood bottom to the frame with wood glue. We fix the parts with special clamps. If they are not there, then you can put something heavy on top of the bottom until the glue dries (for a couple of hours).
5. After the glue dries, we additionally fix the bottom with small carnations, nailing them around the perimeter of the frame.
6. We paint the resulting box with white acrylic paint, covering the walls and bottom of the product with it. After the paint has dried, a decorative black box can be poured into the box.
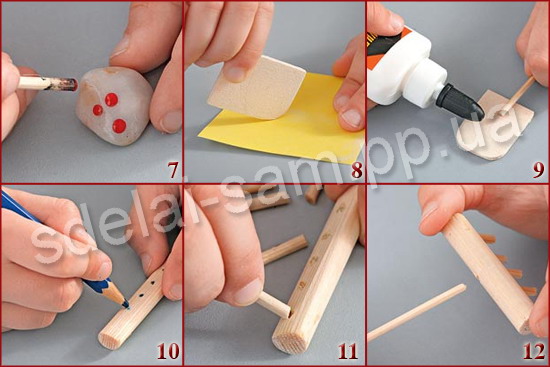
7. We take sea pebbles and paint them with paints of white, red and black colors. Some stones can be painted with simple patterns in the form of stripes and dots. To do this, you can use thin brushes or skewers. After painting and drying the paint, the stones should be covered with a protective layer of glossy acrylic varnish.
8. For a rock garden, you need to make a miniature spatula. To do this, on a small piece of plywood with a thickness of 2 mm, draw a rectangular part measuring 4×3.5 cm. With a jigsaw for fine work, carefully cut out the part and round off two corners, processing them with sandpaper.
9. We make a holder for a shovel 13 cm long from a culinary skewer. We glue it to the base of the shovel with wood glue and paint the entire shovel with acrylic paint.
10. You can also make small rakes. We take a round rail 5 cm long, use sanding paper to make a flat surface from one edge and mark 5 holes on it with a pencil.
11. We drill these five holes with a thin drill, drip a drop of glue into them and insert pieces of wooden skewers cut into 1.5 cm each – these will be the teeth of the rake.
12. At an angle of 60 gr. with respect to the teeth, we drill another hole and insert a rake shaft of the required length into it. As you can see, it is not difficult to make a rock garden with your own hands.
1.
2.
Articles on the history, fundamentals, applications, and various forms of art therapy can be found here.
Only the best offers, interesting company news, useful innovations and no spam!